The creation of an Order is divided into three steps plus a final one that serves as a summary of the data entered in the previous sections:
- ODA Data
- Positions
- Suppliers
- ODA Summary
NOTE: If the Order is generated from a Purchase Request or a Request for Quotation, the fields mentioned in the following paragraphs will already be populated with the data inherited from the Purchase Request or Request for Quotation, and can be modified in every aspect by the User. Otherwise, in the case of a new Order, the data will need to be filled out individually, section by section.
ODA Data
The ODA Data section requires the entry of header information related to the Orders being created. Specifically:
Field | Description | Type |
Subject | Brief description of the Order | Mandatory |
Description | Extended description of the Subject of the Procedure | Optional |
Cost Center | Cost Center related to the Order | Mandatory |
Reference Location | Reference location of the Order | Mandatory |
Currency | Allows the insertion of the reference currency of the Order | Mandatory |
Priority | Indicates the urgency of the Order. Can be Standard, Medium, or High | Mandatory |
Incoterm | Allows the indication of an Incoterm associated with the Order | Optional |
Payment Method | Allows the indication of a Payment Method associated with the Order | Optional |
Requested Date | Allows indication of a past date. If left blank, it defaults to the current date | Optional |
From this section, it is possible to attach ODA documents directly using the button , and add a textual note or attach files from the Communications section at the bottom of the page.
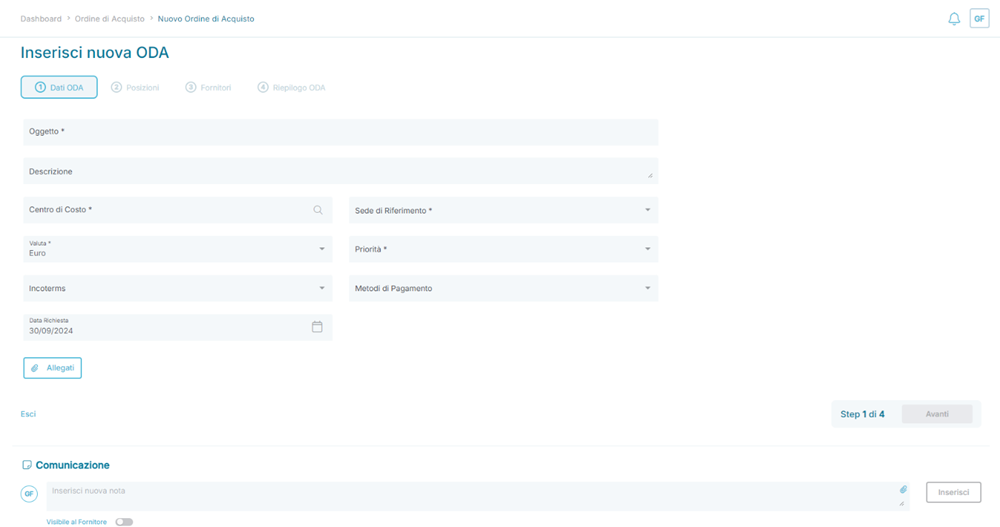
Example of the ODA Data section of a Purchase Order (ODA)
Positions
The Positions section allows for the entry of all Positions related to Orders, either manually or imported from Item Manager. The fields, already pre-filled for Items imported from Item Manager, are listed below:
Field | Description | Type |
Item Name | Brief description of the Position | Mandatory |
Purchase Description | Extended description of the Position’s Item | Optional |
Merceology | Merceology (category) associated with the Position | Mandatory |
Quantity | Indicates the quantity associated with the Position | Mandatory |
Unit of Measure (UM) | Unit of measure associated with the Position | Mandatory |
Expected Delivery Date | Indicates the delivery date associated with the Position | Optional |
Cost Center | Displays the Cost Center inherited from the ODA data section. It can be modified with another Cost Center | Mandatory |
Suggested Price | Indicates the price to purchase the goods/services associated with the Position | Mandatory |
By pressing the button  located on the left side of a Position imported from Item Manager, an additional set of information can be viewed in detail:
- ID
- Item Code
- Item Description
- Merceology Categories
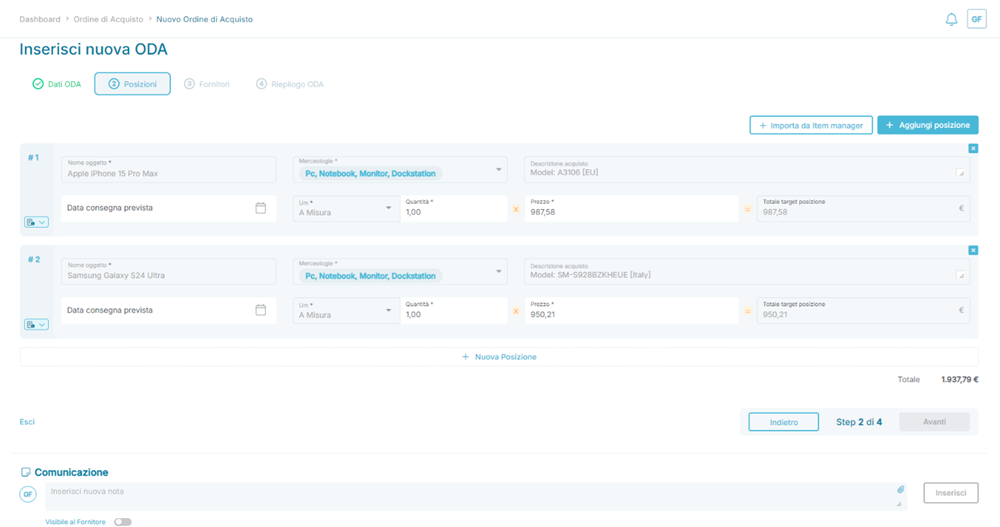
Example of the Positions section of a Purchase Order (ODA)
From this section, it is possible to add a text note or attach files through the Communications section at the bottom of the page.
Suppliers
The Suppliers section allows you to add the supplier who will receive the Purchase Order (ODA). The supplier can be selected from those in the Approved or Blacklist status in the Suppliers Register.
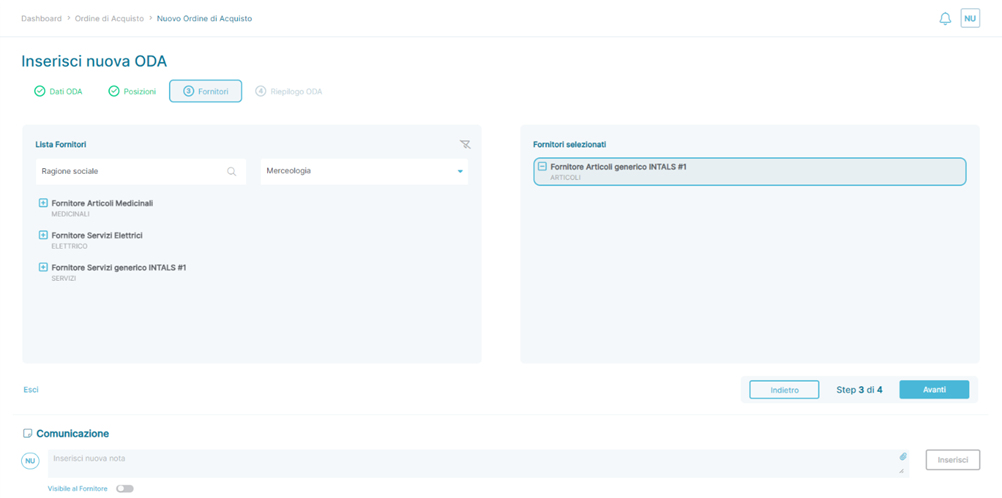
Example of the Suppliers section of a Purchase Order (ODA)
The supplier can be added by clicking the icon  next to the supplier’s name in the Supplier List panel. Once added, the supplier will appear in the Selected Suppliers panel and can be removed (i.e., returned to the Supplier List panel) by clicking the icon
  .
.
IMPORTANT: It is not possible to add more than one supplier in the Selected Suppliers section. If an attempt is made to add another supplier, the action will be blocked, and an informational message will appear at the bottom of the page 
From this section, it is also possible to add a text note or attach files through the Communications section at the bottom of the page.
Summary
The Summary section provides an overview of the information entered in the three previous steps.
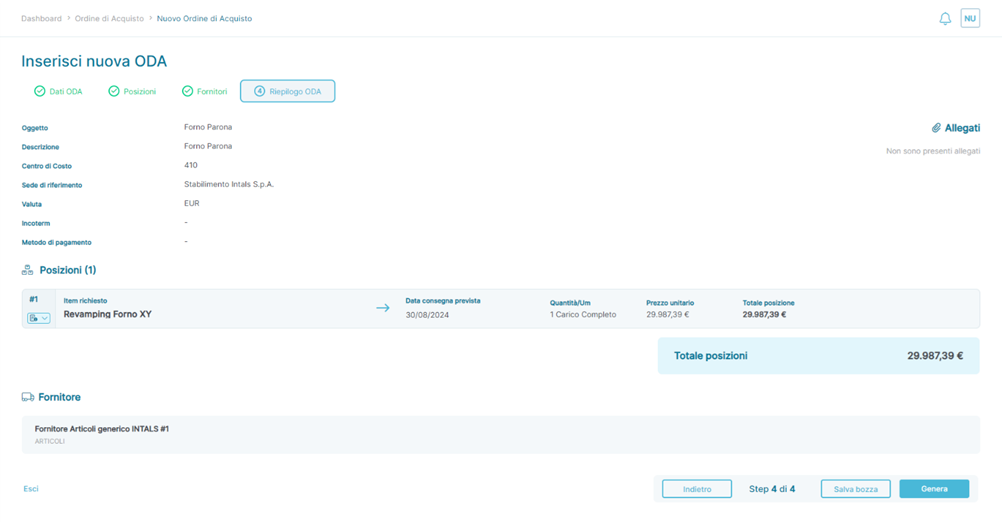
Example of the Summary section of a Purchase Order (ODA)
After reviewing the information entered, which can lead to modifications of previously entered data either by using the button or by clicking on the label of the section to be modified ( ,
,  ,
,  ), the following actions are possible:
- Save as Draft using the button
 , in case you want to resume the activity at a later time and retrieve all the data or
 - Generate the Order using the button

- Upon pressing the button, the order can transition, depending on the platform configurations, into one of the following states:
- If an approval workflow has been configured based on the data entered in the order (see the section Settings -> Add-on -> Approval Workflow):
- In this scenario, the following actions are possible:
- Terminate the order definitively
- Notify the user who created the order that some actions are required before the purchase request can be approved
- In this case, the order becomes editable again, allowing the author to modify all previously entered information
- Advance the order to the next approver (if any)
 If a rule with multiple approvers is matched, all of the buttons described above will be shown to the next approver configured in the rule.
- If there are no further approvers, the approval will trigger the order to transition to the state
 .
.
- In this scenario, the following actions are possible:
 If no approval workflow is configured or if the configured workflows do not apply to the data entered in the order.
- If an approval workflow has been configured based on the data entered in the order (see the section Settings -> Add-on -> Approval Workflow):
- Upon pressing the button, the order can transition, depending on the platform configurations, into one of the following states:
IMPORTANT: The formal sending of the order to the supplier is manual and can only occur once the order reaches the Approved state. This state can be reached automatically by pressing the 'Generate' button if there are no approval workflows applied to the order, or, in the case of active approval workflows, only after all approvers involved in the workflow have completed their approval process (see Settings -> Add-On -> Approval Workflow for more details).
From this section, it is also possible to add a text note or attach files via the Communications section at the bottom of the page.
Was this article helpful?
That’s Great!
Thank you for your feedback
Sorry! We couldn't be helpful
Thank you for your feedback
Feedback sent
We appreciate your effort and will try to fix the article